Showing posts with label Best of PhilosFX. Show all posts

Monday, August 3, 2015

Mattis Quotes

Here, in words and pictures, are a half-dozen of my favorite quotes from

Marine General James "Mad Dog" Mattis

Some of these I made using WikiQuotes as the source for quotes and WikiPedia as the source of the underlying profile picture. Others I selected from among billions readily found in a Google image search. They should proliferate with abandon, in my humble opinion!

Readers Poll:

  • Which of these posters would you most like to have hanging on the wall in your home, office, or home office? (I really like #3 myself!)
  • Have you a favorite Mattis quote not shown here? 

Do tell...

Perhaps you feel General Mattis lacks a certain nuanced approach to engaging with others in the world we all share. Maybe his directness makes you uncomfortable. I understand that. No one thinks James Mattis would be a good candidate for Secretary of State. No one including Mad Dog himself would consider the man a diplomat. Here's the bottom line: when diplomacy fails and it's just you and the other guy and only one will survive, who are you going to call? John Kerry? Or James Mattis?


Saturday, March 16, 2013

Theater Masks: A Fun DIY Papier Mache Project

Theater Mask craft project--Fun and Easy

This was fairly easy and a ton of fun!

My youngest daughter came up with a great idea to satisfy a requirement at school regarding the influence of ancient Greek drama on modern entertainment. Her idea: make a pair of those iconic and seemingly timeless Tragedy and Comedy theater masks.

This post is about our do-it-yourself theater mask project, and I encourage readers to try this at home. We both had a fun time making these life-like, wearable and decorative masks. The masks are painted papier mache over aluminum foil forms. I have not seen the aluminum foil form idea before, but it worked really well! All the steps you need to create your own masks are outlined below.

Step one: chose a design concept

There are many variations on the classic theme. We looked at the various designs that are already out there before developing our own designs. You can buy prints, pre-made masks, and for the crafty, even paint-ready plastic masks. We were feeling uber-crafty, and bent on custom-making our own masks. For inspiration, we searched for images of Theater Masks and found results like these:


Step two was to gather the materials and set up the craft studio.

Materials:

  • 1/4 C white flour, 1 Cwater, and 1/2 tsp salt
  • Sauce pan in which to boil the ingredients to make paste
  • Bowl for dipping the newspaper strips into the paste
  • Stapler
  • Spray paint for the base coat (we used white)
  • Marker to draw features before painting
  • Acrylic paint (we used red and black) and brushes (some flat and some pointed)
  • Ribbon (we used red and black)
  • X-acto blade to cut through the mask for eyes, mouth, and ribbon holes 
  • Large cardboard box to use as a paint booth
  • Aluminum foil, about 21" wide and 40" long per mask. Fold the long strip into 3 plies thick
  • Newspapers--just the newsprint, none of the glossy stuff. 

Preparation:

  • Wear clothes that can stand a little washable paste and paint
  • Cover a large table with newspaper or an old, washable tablecloth
  • Stir the paste ingredients over medium heat until they boil, then turn off the heat and let the mixture cool and gel. Boiled paste is not quite as strong as raw, but boiling helps the masks last longer by preventing mold. 
  • Rip (don't cut) some newspaper into ~1" wide strips. You'll need about 50 each 6" long strips for each layer of each mask, and each mask will need at least two layers
  • Shred some paper to make a kind of modeling clay for some additional features 

Step the third: the frame

Fold some newspaper into 1.5" wide strips, at least 4 plies thick, and as long as you can make them from a sheet of newsprint. Staple or tape the plies together to reinforce them and prevent them unfolding. You'll use these reinforced strips to frame your mask, so you'll need enough to wrap around the perimeter of your model's face, one time for each mask.

Wrap a strip of the reinforced paper around your model's face from under the chin, straight up over the top of the head, and back around to the start point. Staple the form into a closed loop. The shape should slide on and off of the model's face snugly. When you set the frame down on the table, it should retain the oval or almond shape of your model's face. 


Step fourth: the molded face form


The forms were made by pressing 3 plies of aluminum foil over Madeline's highly expressive features. You want enough foil so it keeps its shape when you layer paper mache over it. You want the foil to completely encase the face, so gently press it against the model's face with plenty of slack in the middle to allow you to form-fit it to your model's features. Have your model smile so you can gently press the foil around lips, nose, and eyes and capture the expression. Do the same with the frowning pose so you have two foil face forms.


Step 5ive: apply the papier mache

Tuck the foil forms inside the paper frames. You'll eventually remove the foil from the inside of the finished mask, so be sure the foil fits snugly against the inside of the frame. The combined frame and form is fragile at this point of construction, but it should give you an excellent idea for what the finished mask will look like.

Pour the cooled paste into a large bowl and start dunking strips of paper into the paste. Squeeze off excess pasted with fingers and drape the paper over the form. Keep applying paper until the entire mask form is covered. While the first mask dries, repeat the process on the second mask. You'll need at least two layers of strips.

You can smoosh some of the shredded paper into the paste to make modeling clay. This clay can then be used to build up eyebrows or cheeks as desired.

Excess paste can be stored in the fridge and warmed up for later use, but I do not recommend eating it.


Step 6th: Paint

Let the masks dry for 24 hours before painting. Gently pull the foil away from the inside of the mask. Check to make sure all the paste is thoroughly dry. You can sand the masks at this stage to smooth out rough spots before painting.

I used a large cardboard box as a spray booth, and sprayed a white primer base coat on both masks, and then let the paint dry for 2 hours. Once the white paint was dry, I used a marker to draw the outlines of features such as the eyes and mouth before brushing black and red paint to complete the design.


Step 7: Finish the masks

Time to apply the finishing touches. Use an X-acto blade to make cut-outs for vision and voice. Cut some slices in the temples of the masks just wide enough to pass the ribbon through. Attach the ribbon, long enough to tie behind the wearer's head, et viola!


 ... and anguished with the finished masks.
As you can see, my daughter was both ecstatic ...


Step 8: Clean up

Clean up is a snap. Close out the project with more photos and a celebratory coconut cream pie! 


If you like this idea, why not make some masks at home? Masks have been used for dramatic effect for centuries. Western civilization celebrates the classic Greek theater masks, but masks have been used for many purposes and across diverse cultures. 

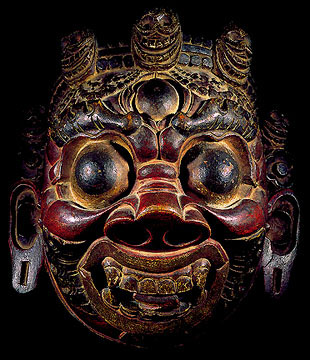
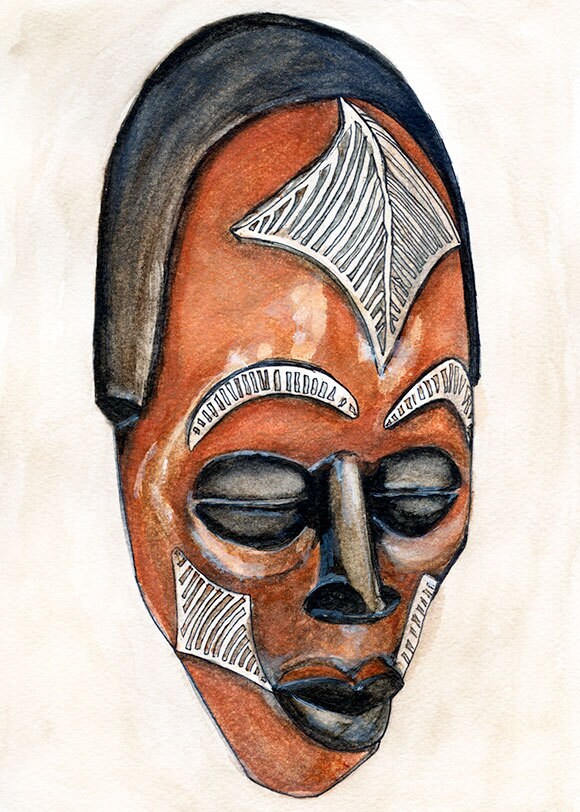
Native American, African, and Asian masks are strikingly different in features, scale, and colors. Such differences reveal interesting culture clues. 


Asian
Native American
African


What about death masks, such as the famous mask made just after President Lincoln succumbed to his fatal wound? 

Lincoln Death Mask

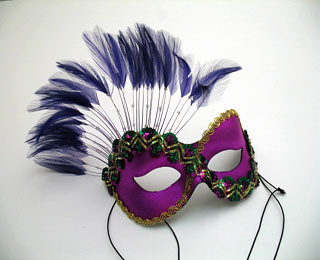
And don't forget the often elegant masks worn at masquerade balls.

Elegant intrigue


What types of masks are favored by thieves? And what explains their preferences? 
Anonymous thuggery

Why not make your own Hallowe'en masks? You can be whomever your heart desires. 

The Penguin of Batman fame


One final example: Mardi Gras!

laissez les bons temps rouler!


Feeling inspired? Consider making your own masks using the technique we developed and described above. Then share your results in the comments, or send us a link to your own blog post. Have fun! 

Sunday, September 4, 2011

A Brief Illustrated History of the Harley-Davidson Road King FLHR

I am proud of my 2008 Road King, which I custom-ordered from the factory in York, PA while deployed to Iraq. My cycle was waiting for me at Patriot Harley-Davidson in Fairfax, VA, when I returned from Baghdad.

The Road King, aka FLHR, is a popular model with a proud history. Introduced in 1994, the Road King has roots going all the way back to the first FL model in 1941.

The very first Harley-Davidsons crafted in 1903 resemble motorized bicycles. As the Motor Company developed larger engines, designers built specialized frames for track racing, off-road racing, climbing, or hauling. The modern Road King is a highly refined touring machine that evolved from the big frame bikes that hogged the American roads in the 1940s.

Since its inception in 1994, the Road King has come in different variants, including the Classic, the Special, and the CVO. Each variant has its own unique model code, such as FLHR, FLHRC, FLHRS. FLHRSE6, and so on. We'll explore the variants as well.


Following is an illustrated history of the undisputed "King of the Road"--Harley-Davidson's Road King.

Year
Event
1940
Big frame bikes included EL, U, UL, UH, and ULH


1941
FL is introduced with 74 cu in Knucklehead, the same frame as EL, U, and UL.
FL replaced UH and ULH.


1948
FL gets a 74 cu in Panhead. U and UL with Flathead discontinued, leaving FL
and EL as the only two large-frame bikes.


1949
FL gets new front suspension, hydraulically damped telescopic forks, and 
a new name, "Hydra-Glide." The "Glide" name was applied to other bikes, 
leading to some confusion.


1952
FL gets a new transmission (hand clutch and foot shift). The EL with its old 
trans and 61 cu in Panhead is discontinued, leaving the FL as the only large-frame bike.


1955
FLH gets a high compression, highly tuned engine and the 3d letter, 'H'.


1958
FLH gets a new frame with a rear swingarm with coil-over-shock suspension 
and a new name, "Duo-Glide."


1965
FLH gets an electric starter and a new name: "Electra-Glide."


1966


1969-'81
FLH gets the Shovelhead and a removable, fork-mounted Batwing fairing.
Later, when the instruments were moved to the fairing it became permanent.


Note: AMF (American Machinery and Foundry) bought Harley-Davidson in 1969, rescuing it from bankruptcy, and sold it in 1981 to a group of thirteen investors led by Vaughn Beals and Willie G. Davidson for $80 million. The AMF years coincided with a difficult period in American manufacturing owing in part to the Oil Embargo impacts.


1972
FLs (H & T) get front disc brakes.


1977
An unfaired FLH is available called FLHS Electra-Glide Sport.
Discontinued in 1982.


1978
An optional 80 cu. in. engine is offered; becomes standard in 1981.


1983
FLH gets a new frame. FLHT is an Electra Glide on the larger FLT Tour Glide 
frame. Comes with Batwing fairing instead of the Tour Glide's frame-mounted
Sharknose fairing.


1984
All FLs get the rubber-mounted Evolution engine and 5-speed transmission


1987
After a 5-year hiatus, an unfaired FLHT is offered under the revised FLHS Electra-Glide Sport name.


1994


1995-2007
The new FLHR Road King replaces the twice-discontinued FLHS.


Starting in 1995, the company introduced Electronic Fuel Injection (EFI) as an option for the 30th anniversary edition Electra Glide. The following year it was an option on all touring models. Harley-Davidson offered both the FLHR and FLHRI, the “I” indicating fuel injection. They continued using the problematic Magnetti-Marelli system up until 2001, when they switched to Delphi. FI became an option on all models except Sporties. With the introduction of the 2007 product line, EFI came standard on all Harley-Davidson motorcycles, including Sportsters.


1999


2002


2003


FLHR gets the Twin Cam 88.


Harley-Davidson launched the Custom Vehicle Operations (CVO) line in 1999. Each year since its inception the Motor Company has selected a couple lucky models for a factory custom make-over. It was the Road King's turn in 2002 and the result: FLHRSEI, or FLHR + Screaming Eagle (as in racing parts) + I (as in fuel injection, to distinguish from carbureted bikes).


For the second year in a row, the Motor Company selected the Road King for factory-installed upgrades in the CVO program. This is the FLHRSE2, which was also briefly known as FLHRSEI^2. In the early 2000's the letter 'I' was used to distinguish fuel-injected bikes from carbureted ones. As the motor company adopted fuel injection across the fleet, they dropped the unnecessary 'I'.  


2007


2007
FLHR gets the Twin Cam 96.


FLHRSE3 comes with a Twin Cam 110 cubic inch (1800cc) black and chrome engine, 6-speed Cruise Drive transmission, a new 18-inch x 3.5-inch chrome Road Winder forged aluminum front wheel, a new 17-inch x 4.5-inch chrome Road Winder forged aluminum rear wheel, and radial tires 130mm x 18-inch front and 170mm x 17-inch rear. 


2008


2008

FLHR gets a new, longer frame, a 6-gallon fuel tank, a 6-speed transmission, antilock brakes, and throttle-by-wire. The picture shown is a poster I made to celebrate the joy of riding my Road King.


The 4th CVO Road King FLHRSE4 is a beauty! 


2009
FLHR gets a new chassis


2010
FLHR gets a new helical-cut 5th gear for improved transmission sound (this gear noise is one of the biggest complaints I have about my 2008).


2011
FLHR gets a new security package option including factory-installed 
Harley-Davidson® Smart Security System with hands-free fob and Anti-lock 
Braking System (ABS).


2012
FLHR gets a new rubber-mounted Twin Cam 103™ V-Twin engine with
Electronic Sequential Port Fuel Injection (ESPFI),  with heated O2 sensors 
and Electronic Throttle Control (ETC), new tubeless chrome aluminum 
profile laced wheel option, and new paint color options.


2013


2013
The standard FLHR is essentially unchanged from the previous year's model, but H-D's 110th Anniversary edition (shown) features a new tank badge and bronze & black paint scheme. The popular Classic edition returns with leather bags and wide white walls.


The fifth CVO Road King edition (FLHRSE5) features these Road King firsts: factory-installed audio, fairing lowers, and a split windscreen. 


2014


2014


The 20th Anniversary of the FLHR Road King passed with little fanfare. Media attention was directed to the roll-out of Project RUSHMORE, the Motor Company's top-secret remodeling effort--a response to customer feedback and market pressure from competitors like Indian and Victory.  Pressure makes diamonds. Enhanced by Project RUSHMORE, the 2014 Harley-Davidson Road King includes the more powerful High Output Twin Cam 103, brighter Dual Halogen headlamp and halogen fog lamps, new Impeller wheels, restyled hard saddlebags and a new easier-to-read speedometer. Reflex™ Linked Brakes with ABS are a new option for the Road King. 


Behold the beautiful FLHRSE6, the sixth CVO Road King, and one of the most beautiful machines I have ever laid eyes on! The lines are gorgeous. The split screen introduced with the SE5 is still the boss, but this model's blacked-out engine guard and racing air filter enhance the smooth, elegant, powerful look of the SE6.


Thank you for reading and sharing your comments. In this post, we covered the mighty Road King FLHR, from its predecessor big-framed bikes through the first 20 years of this iconic model's production (1994-2014). What does Milwaukee have in store for Road King fans? I can hardly wait!