 |
| Theater Mask craft project--Fun and Easy |
This was fairly easy and a ton of fun!
My youngest daughter came up with a great idea to satisfy a requirement at school regarding the influence of ancient Greek drama on modern entertainment. Her idea: make a pair of those iconic and seemingly timeless Tragedy and Comedy theater masks.
This post is about our do-it-yourself theater mask project, and I encourage readers to try this at home. We both had a fun time making these life-like, wearable and decorative masks. The masks are painted papier mache over aluminum foil forms. I have not seen the aluminum foil form idea before, but it worked really well! All the steps you need to create your own masks are outlined below.
Step one: chose a design concept
There are many variations on the classic theme. We looked at the various designs that are already out there before developing our own designs. You can buy prints, pre-made masks, and for the crafty, even paint-ready plastic masks. We were feeling uber-crafty, and bent on custom-making our own masks. For inspiration, we searched for images of Theater Masks and found results like these:
There are many variations on the classic theme. We looked at the various designs that are already out there before developing our own designs. You can buy prints, pre-made masks, and for the crafty, even paint-ready plastic masks. We were feeling uber-crafty, and bent on custom-making our own masks. For inspiration, we searched for images of Theater Masks and found results like these:

Step two was to gather the materials and set up the craft studio.
Materials:
- 1/4 C white flour, 1 Cwater, and 1/2 tsp salt
- Sauce pan in which to boil the ingredients to make paste
- Bowl for dipping the newspaper strips into the paste
- Stapler
- Spray paint for the base coat (we used white)
- Marker to draw features before painting
- Acrylic paint (we used red and black) and brushes (some flat and some pointed)
- Ribbon (we used red and black)
- X-acto blade to cut through the mask for eyes, mouth, and ribbon holes
- Large cardboard box to use as a paint booth
- Aluminum foil, about 21" wide and 40" long per mask. Fold the long strip into 3 plies thick
- Newspapers--just the newsprint, none of the glossy stuff.
Preparation:
- Wear clothes that can stand a little washable paste and paint
- Cover a large table with newspaper or an old, washable tablecloth
- Stir the paste ingredients over medium heat until they boil, then turn off the heat and let the mixture cool and gel. Boiled paste is not quite as strong as raw, but boiling helps the masks last longer by preventing mold.
- Rip (don't cut) some newspaper into ~1" wide strips. You'll need about 50 each 6" long strips for each layer of each mask, and each mask will need at least two layers
- Shred some paper to make a kind of modeling clay for some additional features
Step the third: the frame
Fold some newspaper into 1.5" wide strips, at least 4 plies thick, and as long as you can make them from a sheet of newsprint. Staple or tape the plies together to reinforce them and prevent them unfolding. You'll use these reinforced strips to frame your mask, so you'll need enough to wrap around the perimeter of your model's face, one time for each mask.
Wrap a strip of the reinforced paper around your model's face from under the chin, straight up over the top of the head, and back around to the start point. Staple the form into a closed loop. The shape should slide on and off of the model's face snugly. When you set the frame down on the table, it should retain the oval or almond shape of your model's face.
Step fourth: the molded face form
The forms were made by pressing 3 plies of aluminum foil over Madeline's highly expressive features. You want enough foil so it keeps its shape when you layer paper mache over it. You want the foil to completely encase the face, so gently press it against the model's face with plenty of slack in the middle to allow you to form-fit it to your model's features. Have your model smile so you can gently press the foil around lips, nose, and eyes and capture the expression. Do the same with the frowning pose so you have two foil face forms.


Step 5ive: apply the papier mache
Tuck the foil forms inside the paper frames. You'll eventually remove the foil from the inside of the finished mask, so be sure the foil fits snugly against the inside of the frame. The combined frame and form is fragile at this point of construction, but it should give you an excellent idea for what the finished mask will look like.
Pour the cooled paste into a large bowl and start dunking strips of paper into the paste. Squeeze off excess pasted with fingers and drape the paper over the form. Keep applying paper until the entire mask form is covered. While the first mask dries, repeat the process on the second mask. You'll need at least two layers of strips.
You can smoosh some of the shredded paper into the paste to make modeling clay. This clay can then be used to build up eyebrows or cheeks as desired.
Excess paste can be stored in the fridge and warmed up for later use, but I do not recommend eating it.
Step 6th: Paint
Let the masks dry for 24 hours before painting. Gently pull the foil away from the inside of the mask. Check to make sure all the paste is thoroughly dry. You can sand the masks at this stage to smooth out rough spots before painting.
I used a large cardboard box as a spray booth, and sprayed a white primer base coat on both masks, and then let the paint dry for 2 hours. Once the white paint was dry, I used a marker to draw the outlines of features such as the eyes and mouth before brushing black and red paint to complete the design.
Step 7: Finish the masks
Time to apply the finishing touches. Use an X-acto blade to make cut-outs for vision and voice. Cut some slices in the temples of the masks just wide enough to pass the ribbon through. Attach the ribbon, long enough to tie behind the wearer's head, et viola!
Time to apply the finishing touches. Use an X-acto blade to make cut-outs for vision and voice. Cut some slices in the temples of the masks just wide enough to pass the ribbon through. Attach the ribbon, long enough to tie behind the wearer's head, et viola!
 |
| ... and anguished with the finished masks. |
 |
| As you can see, my daughter was both ecstatic ... |
Step 8: Clean up
Clean up is a snap. Close out the project with more photos and a celebratory coconut cream pie!
Clean up is a snap. Close out the project with more photos and a celebratory coconut cream pie!

If you like this idea, why not make some masks at home? Masks have been used for dramatic effect for centuries. Western civilization celebrates the classic Greek theater masks, but masks have been used for many purposes and across diverse cultures.
Native American, African, and Asian masks are strikingly different in features, scale, and colors. Such differences reveal interesting culture clues.
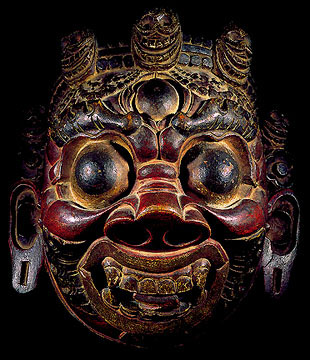 |
| Asian |
 |
| Native American |
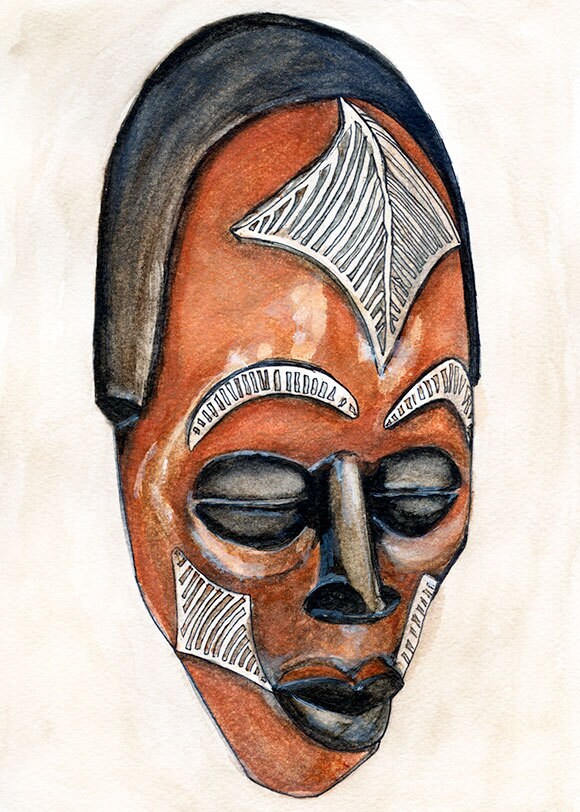 |
| African |
What about death masks, such as the famous mask made just after President Lincoln succumbed to his fatal wound?
 |
| Lincoln Death Mask |
And don't forget the often elegant masks worn at masquerade balls.
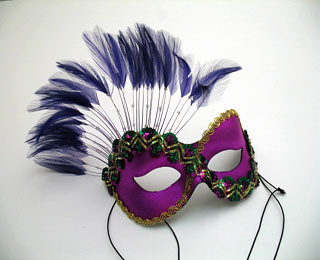 |
| Elegant intrigue |
What types of masks are favored by thieves? And what explains their preferences?
 |
| Anonymous thuggery |
Why not make your own Hallowe'en masks? You can be whomever your heart desires.
 |
| The Penguin of Batman fame |
One final example: Mardi Gras!
 |
| laissez les bons temps rouler! |
Feeling inspired? Consider making your own masks using the technique we developed and described above. Then share your results in the comments, or send us a link to your own blog post. Have fun!
No comments:
Post a Comment